Techniques and Tutorials

Palette Knife Tulips Demo (Dedicated to Mom!)

For Ashley

I’m going to start off by saying I used to be really bad at painting anything outside of my quite narrow areas of interest. I went through a phase where I was putting dragon wings on everything, for example, and only did fantasy or surrealism inspired art. I remember my roommate freshman year of college asking me to paint a picture of a teenage girl holding a cat surrounded by flowers after she found out I was an artist (She was the opposite of me, into all pastel cutesy stuff). Hence, this dead eyed girl and cat with guess what, dragon wings, was born. If I still had it, I’d consider submitting it to The Museum Of Bad Art.

Over the years and especially through teaching, I’ve learned to enjoy the process of creating itself and not just the end result, so that even if I’m making something that isn’t necessarily my go-to aesthetic, I can still harness the therapeutic benefits of creativity. This makes accepting commissions a lot easier, and creating art for loved ones that may not fancy surrealism and oddity as much as I do. I have literally never painted tulips in my life, but my mom loves them and while we were recently out walking remarked on the beauty of a particular variety planted at Dow Gardens. I hope you enjoy this visual walkthrough of the process!

Advertisement
Standard
Techniques and Tutorials

Happy Heart Art Watercolor Demo

Hope you all are staying safe out there! This easy do-at-home illustration project is inspired by all the happy heart art I’ve been seeing in person as I walk through my neighborhood and in photos and videos online. It is a difficult, unfortunate situation we are experiencing across the globe, but we can always turn to creativity to make connections to others even when we cannot be in close proximity, and to create joy in our own life in uncertain times.

For this project, you will need only paper (obviously watercolor paper is ideal but if you don’t have any on hand, any heavier paper that will take water a little better can work), an assortment of brushes, a permanent fine liner pen (Sharpies will work), watercolor paints, and water soluble markers (classic washable crayolas work if you don’t have traditional watercolor or art markers).

This is a fun illustration to try for all ages, and you can really get creative and make it your own. You can even make it a self portrait to express how you are feeling! Give this simple project a go, and if you have kids in the house encourage them to join you :).


Sending love <3! As always, if you try this out at home and have any issues feel free to shoot me a comment or message, I’m here to help!

If you enjoyed this, check out my other watercolor tutorials:

Barn Owl

Jellyfish

Tiger

Stained Glass Tree Illustration


Standard
Techniques and Tutorials

Ink and Water Tiger Illustration Tutorial

So, I promise I have been continuing to make entertaining quarantine content to keep hands and minds busy for those spending a lot of time at home, but have just gotten behind on posting it here. I’m excited to share a popular project that I often do with my watercolor class at Creative 360 Studio and Gallery.

For this project, you will need:

  • Watercolor paper (or a heavier paper that can take getting wet)
  • Water soluble markers (I use Tombo brush markers, but if you don’t have art markers on hand washable Crayola markers can work too)
  • Pencil
  • Round brushes in a variety of sizes

This tiger combines both drawing and painting techniques, and is fun for all skill levels, even those who never do art. Join the fun and give it a try!

If you find you have some questions or need advice, feel free to leave a comment. I’m always willing to help! 🙂


Standard
Techniques and Tutorials

Mid-Century Modern Tea Party – Butterflies

I’m back with another mid-century modern spring illustrations tutorial! Moving on to my next teacup, today I’m doing butterflies. Similar to my last tutorial, you can create any of these designs the same way on paper with any drawing or painting materials you may have on hand. If painting on glass, keep in mind you will need multiple coats if you want solid coverage, but you may also like the transparency – it’s up to you. To keep your designs permanent, they need to be heated in a conventional oven. Put glass pieces in a cold oven, then set to 350 degrees for 30 minutes. Turn off the heat and LEAVE the glass in the oven until completely cooled down.

For this design, you are going to start with 4 teardrop shapes for your butterfly wings. The top 2 should be tilted at a downward diagonal, and the bottom 2 at an upward diagonal. Try to smooth out your paint as flat and even as possible, spreading out any “globs”. I used a flat brush rather than a round, pointed brush to achieve more even coverage. For the flowers, add some upward facing bell or “cup” shapes at different heights. Once the orange dried on my butterfly wings, I chose to streak some yellow over as well with a smaller round brush.

Next, I added some accents over my solid shapes in white. I painted a smaller identical teardrop shape inside each of my wings. I also added an elongated almond shape to the top of each of my bells which will be the opening of each flower.

I also added the leaves by painting green teardrop shapes tilting diagonally upward centered under each of my flower heads. I dipped the opposite end of my paintbrush in paint and stamped dots down the center of each leaf as an added decoration.

The last addition after the leaves was a small orange diamond in between the bottom butterfly wings. This will start the body. The rest of the body will be added with line work.

Next, I added one more set of teardrop shapes inside the white on the wings in yellow. I also used a fine detail brush to add yellow stripes across the small diamond shape in between my wings.

Last is the line work that brings everything together and makes it pop. For this part, you can either use a black paint marker or a small detail brush with a pointed tip. Outline Your outer bell shape, white flower opening, and leaves.  Add a line connecting the flower head to the leaves. To finish the flower, I then used the tip of my brush and a light touch, hardly pressing on the surface, to add 4 streaks radiating up from the base of the flower head. I also added 5-6 short lines inside each flower opening, and then used the opposite end of my brush to stamp tiny dots on the end of each of these lines on the inside of the flower.  For the butterfly, I outlined each teardrop shape that make up the wings, as well as the small diamond shape.

The last detail was adding a line down the center of the wings, with two curved antennae branching off at the top. 

It’s amazing what you can do with simple shapes! I will be doing 4 designs in all with different flowers and insects, check back for more! The final set will be available for sale in Express Yourself Artshop’s Virtual Gallery, an ongoing fundraiser for the arts and wellness program I direct.

Standard
Techniques and Tutorials

Jellyfish Watercolor Tutorial

Another day, another tutorial! I’m making my way through my favorite animals first, with yesterday’s owl and now today a colorful jellyfish. Let’s paint!

You will need:

  • Watercolor paper (I used a 6×6″ piece, but you can work bigger if you’d like as well)
  • 3 Paint colors: A blue of your choice, and 2 accent colors. I chose magenta and lime green. You could also use 3 different shades of blue if you want. Jellyfish come in many colors!
  • A large (I used size 8), medium (I used size 5), and detail (I used size 0) round brush (The brushes that come to a point at the end).
  • A large flat brush (The brushes with rectangular bristles, flat on the end).

Start by adding a good amount of water to your main blue color choice to dilute it down to a light wash. Use your large flat brush to fill in the entire paper pale blue. Use long back and forth strokes, brushing in the same direction horizontally across your paper. There may be some streaks and this is ok as we are trying to create our water :). If you want to even anything out a bit more, you can brush over darker areas with plain water using the same brush to blend. Let this dry. Once the background is dry, grab your medium round brush. Dip the brush in some of the same blue color, but with less water so it goes on a bit darker. Outline a shape that looks like the top of a cupcake in the upper right corner.

Rinse off your brush, and with just water run your brush along the inside edge of that outline to blend it inward. Grab some more blue, and make 3 squiggly lines coming down from your cupcake shape. Curving them on the end makes it look more natural, like how they would be flowing as the jellyfish swims through the water. Using the same brush, grab some more of that same blue and add a paint streak along each side of your jellyfish top, and make some short strokes also along the bottom edge.

Rinse off your brush, then go over these blue streaks you just added with water to blend. Using the same brush, take your chosen accent color and make some squiggly lines over your blue ones in that new color. Next, we are going to use our small detail brush. Take your other accent color and make a curved bridge shape near the top of your jellyfish body. Streak some lines coming down from that bridge. Use your detail brush to make some thin tentacles flowing out from the body as well. Use the tip of your brush and drag it across with a light touch, hardly putting any pressure on the paper to get thin, flowing lines. If you are having trouble making a continuous stroke, just add more water. Your tentacles can flow in all different directions as they float through the water.

Rinse off your detail brush, and grab some of your first accent color that you used on the squiggly center tentacles. Make a broken scalloped outline along the bottom of the jellyfish body. You can also add an oval up top with some short, radial streaks coming down from the circle, like a simple sun shape. For a finishing touch, take your large round brush now and dip it in some watered down paint in the original color you used for the background – You don’t want this to be too dark. Make some bubbly, cloud-like texture in a portion of the blank space around your jellyfish by filling in the areas using a circular motion with your brush. Your brush should be laying at an angle as you do this.

These are so fun to make in different colors – You could create a whole jellyfish army!

Be sure to follow for more art fun to keep your mind and hands busy :).

Standard
Techniques and Tutorials

Barn Owl Watercolor Tutorial

In light of social distancing precautions, we all are ending up with some unexpected downtime. It can certainly be discouraging and frustrating, but we can also use this time to our advantage to bring something positive out of a negative situation. I will be posting some simple tutorials on a regular basis over the next couple weeks. The best thing to do when things are uncertain is to occupy your mind, especially with something creative. Let’s have some fun!

To create this owl, you will need:

  • Watercolor paper (I used a 6×6″ piece, but you can work bigger if you’d like as well)
  • 3 Paint colors: Grey (or if using black add a lot more water to lighten it), Burnt Umber (or any dark brown), and Raw Sienna (or any bright, warm brown)
  • A large (I used size 8), medium (I used size 5), and detail (I used size 0) round brush (The brushes that come to a point at the end).
  • A medium size flat brush (The brushes with rectangular bristles, flat on the end).
  • A pencil
  • Optional: Black liner pen (Like a fine point Sharpie!)

Start with a light pencil outline made from basic shapes to guide your painting. Draw a circle for the head, a teardrop shape coming diagonally out from that circle for the body, and another smaller teardrop shape sticking out from the bottom center of the body for the tail feathers.

Using your large round brush, water down your raw sienna paint – you do not want this first layer too dark. Following the shape of the body keeping all your brushstrokes in the same direction flowing downward, fill in the wings, leaving the head and the chest white for now.

Using your detail brush, make some jagged up-and-down strokes with a watered down grey along the front of the chest, underneath the head, and along the back of the neck.

Rinse off your detail brush, and using the same brush strokes go over your grey you just added to the chest and neck with water. This will help blend the grey so your transition from grey to white is more gradual, and you end up with a soft, feathery look. Next, using your detail brush and watered down grey, outline a pointed “U” shape in the center of the face. Make some radial brush strokes sticking out from the top of the U where the eyes will be using your detail brush.

Still using your detail brush, add some radial strokes along the outside edge of the head, including one ray down the center from the top pointing to the beak. Add some grey to fill in the end of the beak. Rinse off your brush, and lightly brush over what you just added with a damp brush to blend it.

Continuing to use your detail brush, add a border around the head with raw sienna using short, radial strokes pointing inwards towards the face. Don’t forget the widow’s peak up top :)! Water down your raw sienna a bit more, and add some of this pale warm brown to the area where the eyes will be, using radial brush strokes again pointing outward from the top of the U shape.

Next, we are going to start adding texture to the feathers. Dip your medium round brush in some raw sienna with a little less water so the coverage is a bit darker than the base underneath. Stamp up and down over the entire area to create blots of color (This is called stippling.).

Do the same thing overtop while the raw sienna is still wet with the burnt umber on the top section of the wings. Add a bit of water to your umber first, but you still want it to be pretty dark.

Then, use your detail brush to create some thin outlines in burnt umber. Hold your brush at a 90 degree angle to your paper and use a light touch, hardly pressing down at all as you drag your brush to create thin lines. Create a darker outline around the inner edge of the raw sienna outline around the face. Outline the wing, and add some lines to the bottom section of the wing and tail feathers following the direction of the shape.

Still using your detail brush and burnt umber, make some groupings of short, vertical brush strokes to create striping in the wing and tail feathers in between the lines. Make them jagged and uneven for a more realistic feathery look.

Next, using your flat brush add some more water to your burnt umber. Using the width of your brush, drag a diagonal line underneath the owl starting at the bottom of the chest.

Go back to your detail brush, and grab some burnt umber with a little less water mixed in so you get a darker color. Add some short streaks of this darker shade over the post while it is still wet. Then, using the very tip of your brush, lightly add some speckled dots over the chest. Less is more! You still want to see mostly white.

IMG_20200317_110314

Now for the finishing touches! Use your detail brush to create a hooked shape with the burnt umber for the talon. Use your medium round brush to add a dark burnt umber feather shape visible from behind, between the tail feathers and the post. The last step is the eyes. Create a downward slanted football shape in the area we shaded for the eyes. You may use your detail brush to fill in the eye in grey or black, but you can also use a black liner pen for a little extra control. Be sure to leave a small circle open near the top of each eye for the reflection – This is what really makes your owl look alive!

I hope you’ve enjoyed this tutorial! If it didn’t come out exactly how you expected the first time, remember it just takes practice and the goal is experimenting and fun. No matter the outcome, you know more than before you started!

You don’t have to use natural colors for this project either. I think it would be fun to try a whimsical, fantasy owl in wild colors like purples, oranges, magenta, lime green … There are no rules! If you feel like sharing, post a picture in the comments of how yours turned out and as always, if you have questions don’t hesitate to ask! Stay safe everyone!


Standard
Techniques and Tutorials

Blending With Watercolors – Stained Glass Ocean Project

wc blend 1

Hello! Today I want to show you a fun beginner project you can do to practice blending colors with watercolor paints and markers. If you are a complete beginner to color mixing, it is easiest to stick to either all warm colors (red, yellow, pink, orange …) or all cool colors like I did (blue, green, violet …). Some colors when blended together turn into “mud”, making a neutral like brown or gray. This is where understanding the color wheel comes in handy! For more about the color wheel, visit my earlier post Colors Aren’t Scary :). For this project, we will try out both flat brushes and round brushes. Round brushes have a teardrop shaped bristle that comes to a point at the end, and flat brushes have rectangular shaped bristles that are, well, flat on the end. Pretty easy to remember! It’s good to have a variety of sizes of each. Your brush size depends on the size of the area you are filling in. If your brush is too big, you risk getting paint where you don’t want it  but if your brush is too small, you will see all the little strokes and the paint won’t cover evenly.

wc blend 2

I started first with an outline, drawing my design in pencil on watercolor paper and then tracing over it with a waterproof black fine-liner pen (Sharpie fine points will work – You do not necessarily need a fancy art pen, though my preference when I do watercolor and ink work are these bad boys by Staedler.). You can draw your design however you want, or if you want to practice this technique without the added pressure of drawing, feel free to print this outline out and use graphite paper to transfer it right onto a piece of watercolor paper (Don’t have graphite paper on hand? Just shade over the back of your printout with a pencil, lay it on top of your watercolor paper, and trace over the lines and it will work the same way, though a bit more labor intensive.).


With watercolor, you want to start with the background and move to the foreground, and you always want to work lightest to darkest. It’s all about layering and building up colors since the paints themselves are translucent. In this more simplified project, we will be focusing just on blending this time, not layering. Still, working with the background first ensures that if any background color does find its way into the waves, which it inevitably will, we can just work right over it later and you won’t even notice by the end. Starting with the background, you want to choose a couple of colors (I used a cornflower blue and a cerulean blue.) and water them down so that they are consisting of mainly water with a small amount of pigment. Then you want to use a larger round brush and start filling in the space using circular motions. This will give our background wash a bit of texture, so that it has a hazy, cloud-like appearance rather than just flat streaks. I applied the cornflower blue on the bottom half of my sky and the cerulean on the top. Because both colors are wet, they should bleed into each other and blend together in a pretty seamless gradation. Be sure to overlap the two colors slightly where they meet. If they aren’t blending enough, you may also rinse off your brush and using the same circular motion run over the line where they touch with your damp brush to work them together further.

Color blending is one of the foundation skills of painting with watercolors, but it takes a lot of practice. Good thing you are about to get a lot of it! We did a textured blend for the background, but within an individual space inside our waves, we are now going to practice some flat blending with the goal of getting our colors to merge into as smooth of a gradation as possible. Now we are going to use a medium sized flat brush. A flat brush will be perfect for the smooth effect we need and will also be easier to keep inside the edges of our geometric shapes. You can tilt the brush so you are only using the tip rather than the whole side for narrower areas. Pick 2 different colors, and start painting one color on one end until you’ve gotten to about halfway across. Rinse your brush, and paint in another color starting on the opposite end, overlapping in the middle. A unique quality watercolor has is that when one color touches another while it is still wet, they WILL bleed into each other. In this case, that is a good thing as using wet-on-wet color with watercolors makes for some pretty low-effort, seamless blending. Still, watercolor can be finicky and things don’t always go as planned. I purposely filled the shape in so that there are darker, patchy areas and a harsh transition between the two colors. This happens sometimes, but can be easily rectified by going back over the uneven area with a damp brush. Be sure to always paint in the same direction, following the length of your shape.

Blending with watercolor markers is a similar process, but you need to be a bit more controlled with your water application so that you don’t completely lose the effect of the ink. I love watercolor markers because you can get such bold contrast, but a little bit of ink goes a long way, and with too much water your separate colors will just swim all together into one mass.  I cannot emphasize enough, quality also matters. If you get cheap markers, chances are they won’t blend nicely no matter how skillful the artist. They don’t need to be officially called “watercolor markers”, they just need to be water soluble so they will run when wet. I love using Tombow’s water soluble brush markers. You also need to think about the values of the markers you are using. Deeper colors will spread a lot farther than paler colors, and can overpower. I have started with a darker color, a royal blue, and a lighter more muted color, a sage green. Start by scribbling a bit of each color on opposite ends of your shape. You do NOT want to shade the entire area in. Again, a little bit of ink goes a long way when water is added. Then, still using a flat brush you want to dip your brush in some water, tapping off the extra on a nearby paper towel. Wet the ink on one side and work it into the middle of the shape. Rinse off your brush, and wet the ink on the other side, again working towards the middle where they will meet. The wet colors will again, flow together and seamlessly blend pretty much on their own once they meet, staying darkest where you first laid down the ink. You can see above that a gradation is apparent, but the blue has pretty much taken over as the main color you see.

Trying the process again using the same 2 colors, but shading in only a tiny bit of blue and more of the green, you can see we get a more balanced effect where the pure green color is still highly visible.


You can also create a gradation with only one color. The beauty of watercolor is the depth of value that can be captured from one single hue, simply by adjusting the amount of water added. To do this you would apply a bit of the same color on each end in a darker or medium value (mixing less water with your paint). Then, rinsing off your brush, add some water to the edge of the area of color on each side, again spreading towards the center from each end. The color will remain most saturated at the ends, and will be the lightest (most watered down) in the center.

If at any point you add too much water, your gradation is in danger of all just running together into one flat tone. If this happens, you can blot the area with a paper towel to lift the excess water (and some of the pigment), and then blend right over again. You don’t want to see any “puddles” pooling on your paper … that is a sign there is too much water being used. Also keep in mind damp is ok, but if you are filling in a new area next to an old one that is still very wet, the colors will bleed together over your lines. Sometimes it helps to use a blow-dryer to speed along the drying process. Or, you could just work on filling in areas that aren’t touching each other until each spot dries. The paint air dries pretty quick.

wc blend 1

Here is a reminder of the final image! It is the same blending process for each section, which is what makes it good practice. I filled in some spaces using the markers, and some with paint. I kept lighter colors on the crests of the waves, and alternated medium and dark tones throughout the body of water, making sure not to fill in too many of the same colors right next to each other. It always feels good to still have some sort of finished product after practicing techniques, and I guarantee you will start to see a difference in the first couple spaces you fill in versus the last! Remember, it’s all about playing with color. Have fun!

Standard
Techniques and Tutorials

Start Drawing Amazing Eyes!

Eyes have always been my absolute favorite thing to draw, and I tend to accentuate them in all of my artwork. They can also be one of the most difficult things to draw, and it takes a lot of practice to get them right. There are a lot of picky little details to pay attention to. When we begin drawing an eye how we “think” we should, without really observing an actual eye’s appearance as if we have never seen one before, we tend to end up with a drawing like below. Generic football shape, outlined individual eyelashes, harshly contrasting pupil and highlights, and those pesky little lines jutting out all around the center like a kid’s drawing of the sun. In reality, an eye’s darks and lights are much more subtle and blended, each person’s eye is a completely different shape, and unless we are drawing a huge zoomed-in eye filling an entire 18×24″ piece of paper, you wouldn’t actually see individual eyelashes. I’d like to share my tricks of the trade with you. Grab a piece of paper and follow along. It will be fun, I promise! Don’t worry about doing everything “perfect”, just enjoy sketching. Every artist does things slightly different, and the more you practice you may discover some of your own “tricks” that work for you.

eyenono

  1. Lightly outline the contour of the eye. Don’t just draw an oval with half circles above and below it. Pay attention to the exact curvature of the unique eye you are trying to draw (photo references are always good.) Is it wider on one side than the other? Does the eyelid dip down drastically or does it curve more gradually? Are the curves of the eye and eyelid soft and smooth, or more angular? Is the eyelid rounded or more flat on top? Is the fold under the eye parallel to the bottom eyelid, or does it droop diagonally? Sketch lightly, as you don’t want to see harsh outlines through your shading.
  2. Shade the outside perimeter of the eyeball. The darkest shading is always at the two corners of the eye, and gradually fades as you get closer to the iris. There will also be a deeper shadow underneath the eyelid since the lid overlaps our eyeball, blocking the light from reflecting as much up top.
  3. Shade around the iris, again with slightly deeper shading closer to the top eyelid. Even if you don’t explicitly see shadows near the iris in your photo reference, the white of our eyes are never really pure white, and you will get a much more realistic look if there is a gradual transition between the iris and the white of the eye, rather than going from fully colored in iris to stark, clean paper in the white of the eye. This step helps the iris look “settled” into the eyeball rather than looking as if it is “hovering” on top if it.
  4. Add your darkest shading on the top of the iris. This should be a shade darker than your darkest value that you used previously underneath the eyelid when you shaded the white of the eye. Think of a crescent moon facing downward, with the thickest shading up top, getting thinner and then altogether disappearing as it trails down around the edges of your circle shape.
  5. Add in your pupil and reflections. The reason we do this next is because we want to have the reflection areas mapped out before you get to shading the rest of your iris. You can go in with an eraser and add highlights by removing shading afterward, but this can be messy and end up smudging work you don’t wish to be smudged. I find it easier to just leave the highlights white to begin with. The location varies by light source if you are using a photo reference. Without a specific reference, it is safe to add two highlights, one on top and one on bottom at a diagonal to each other. Fill the pupil in dark black. This will be your darkest value.
  6. Shade around the pupil using the same value you used to shade your crescent moon around the top of the iris, one step lighter than black. Again, this anchors the pupil inside the iris so it doesn’t seem as if it is floating on top. This gradual gradation from dark to light makes the separate parts appear as a whole.
  7. Fill the remainder of the iris with a medium value. Again, we want all our value transitions to be gradual, so get a little lighter when you begin shading around the edges of your highlight areas.
  8. While we don’t want radial stripes circling the inside or our iris, we don’t want to smooth all the visual texture out of it either, as the striations of dark and light we see are part of the deep beauty of eyes. Literally “scribble” some slightly darker shading shooting out from the pupil in the two areas between our highlights. Again, please scribble though it may seem odd and scary; we don’t want neat, individual lines extending from the pupil.
  9. Add the tear duct by simply finishing the shading around your eyeball, cutting off the little teardrop shaped dip in the inner corner.
  10. Shade your eyelid! Shade the darkest in a thin line over the crease you originally outlined. Don’t just trace your line darker, shade by moving your pencil back and forth swiftly in short strokes over this line. Above this, shade a touch lighter to again make a gradual transition from dark shadow to white paper. Shade darkly also over the curved line directly above your eyeball, the edge of the eyelid. This will provide a foundation for the eyelashes, which we will add later. Shade along the bottom eyelid like this also.
  11. Shade the bottom crease under your eye. This is not a direct “fold” so it should be lighter than the shading for the eyelid since it is less in shadow. Shade deepest along the line you originally sketched, and shade lighter around this line on top and bottom. Extend the shading up to the outer corner of the eye to really show the skin curving. Add some light shading under the dark crease of the upper eyelid.
  12. We’re going to scribble again! Add some jagged shading pointing out from the top and bottom eyelid where the eyelashes will go, more so on top than on bottom. Do this in a medium value.
  13. Now, you can go over and add some individual curved darker lines sticking out to add some detail to your eyelash area. Don’t make them all the same length, and try to curve them – no straight lines poking out! Add a bunch overlapping each other using swift, light strokes with your pencil. They should be dense and close together.

These are not hard and fast “rules”, and once you’ve practiced the basic guidelines you can twist them to create entrancing eyes in your own unique artistic style, both realistic and more comic or stylized.

Speaking of eyes, I just designed a new pattern for Redbubble covered in glamorous eyeballs for your enjoyment. Check out all the cool new products featuring my digitally drawn pattern Mascara Tears here!

Feel free to throw a comment my way if you have any other drawing questions, I’m always open for giving tips. Any best practices other illustrators out there have found helpful? Don’t hesitate to share!

Standard
Techniques and Tutorials

10 Ways to Make Your 2D Art More Interesting

I have always been a 2D based artist, not for lack of trying to branch out. I can make a 2-dimensional plane on paper look 3-dimensional, but when it comes to actually constructing a 3-dimensional object … my brain just does not work that way.

vernacularvillageroofI studied interior design in college, and I remember dreading the 3D model portion of each semester-long project. This is the one and only photograph I have of any of my models, and it is taken in aerial view because that was literally the only acceptable angle I could manage. At least this one wasn’t cut out of a Lucky Charms cereal box. Yes, I really turned in a model covered in pictures of colorful, Leprechaun themed marshmallows. Yes, it was sad. Now they have 3D printers for this crap.

For other artists out there who only travel in the world of 2D, it can be easy to feel stuck in a rut materials-wise. After all, you can make sculptures out of anything. 

0fb57244bef63cbbd90a127239d15868

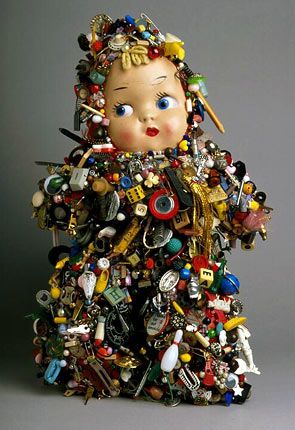
No, really, I mean ANYTHING …


If you think outside the box, “flat” art on paper or canvas doesn’t have to be limiting. Here are 10 ways I’ve found that can spice up your current drawings or paintings, no matter what style you enjoy working in.
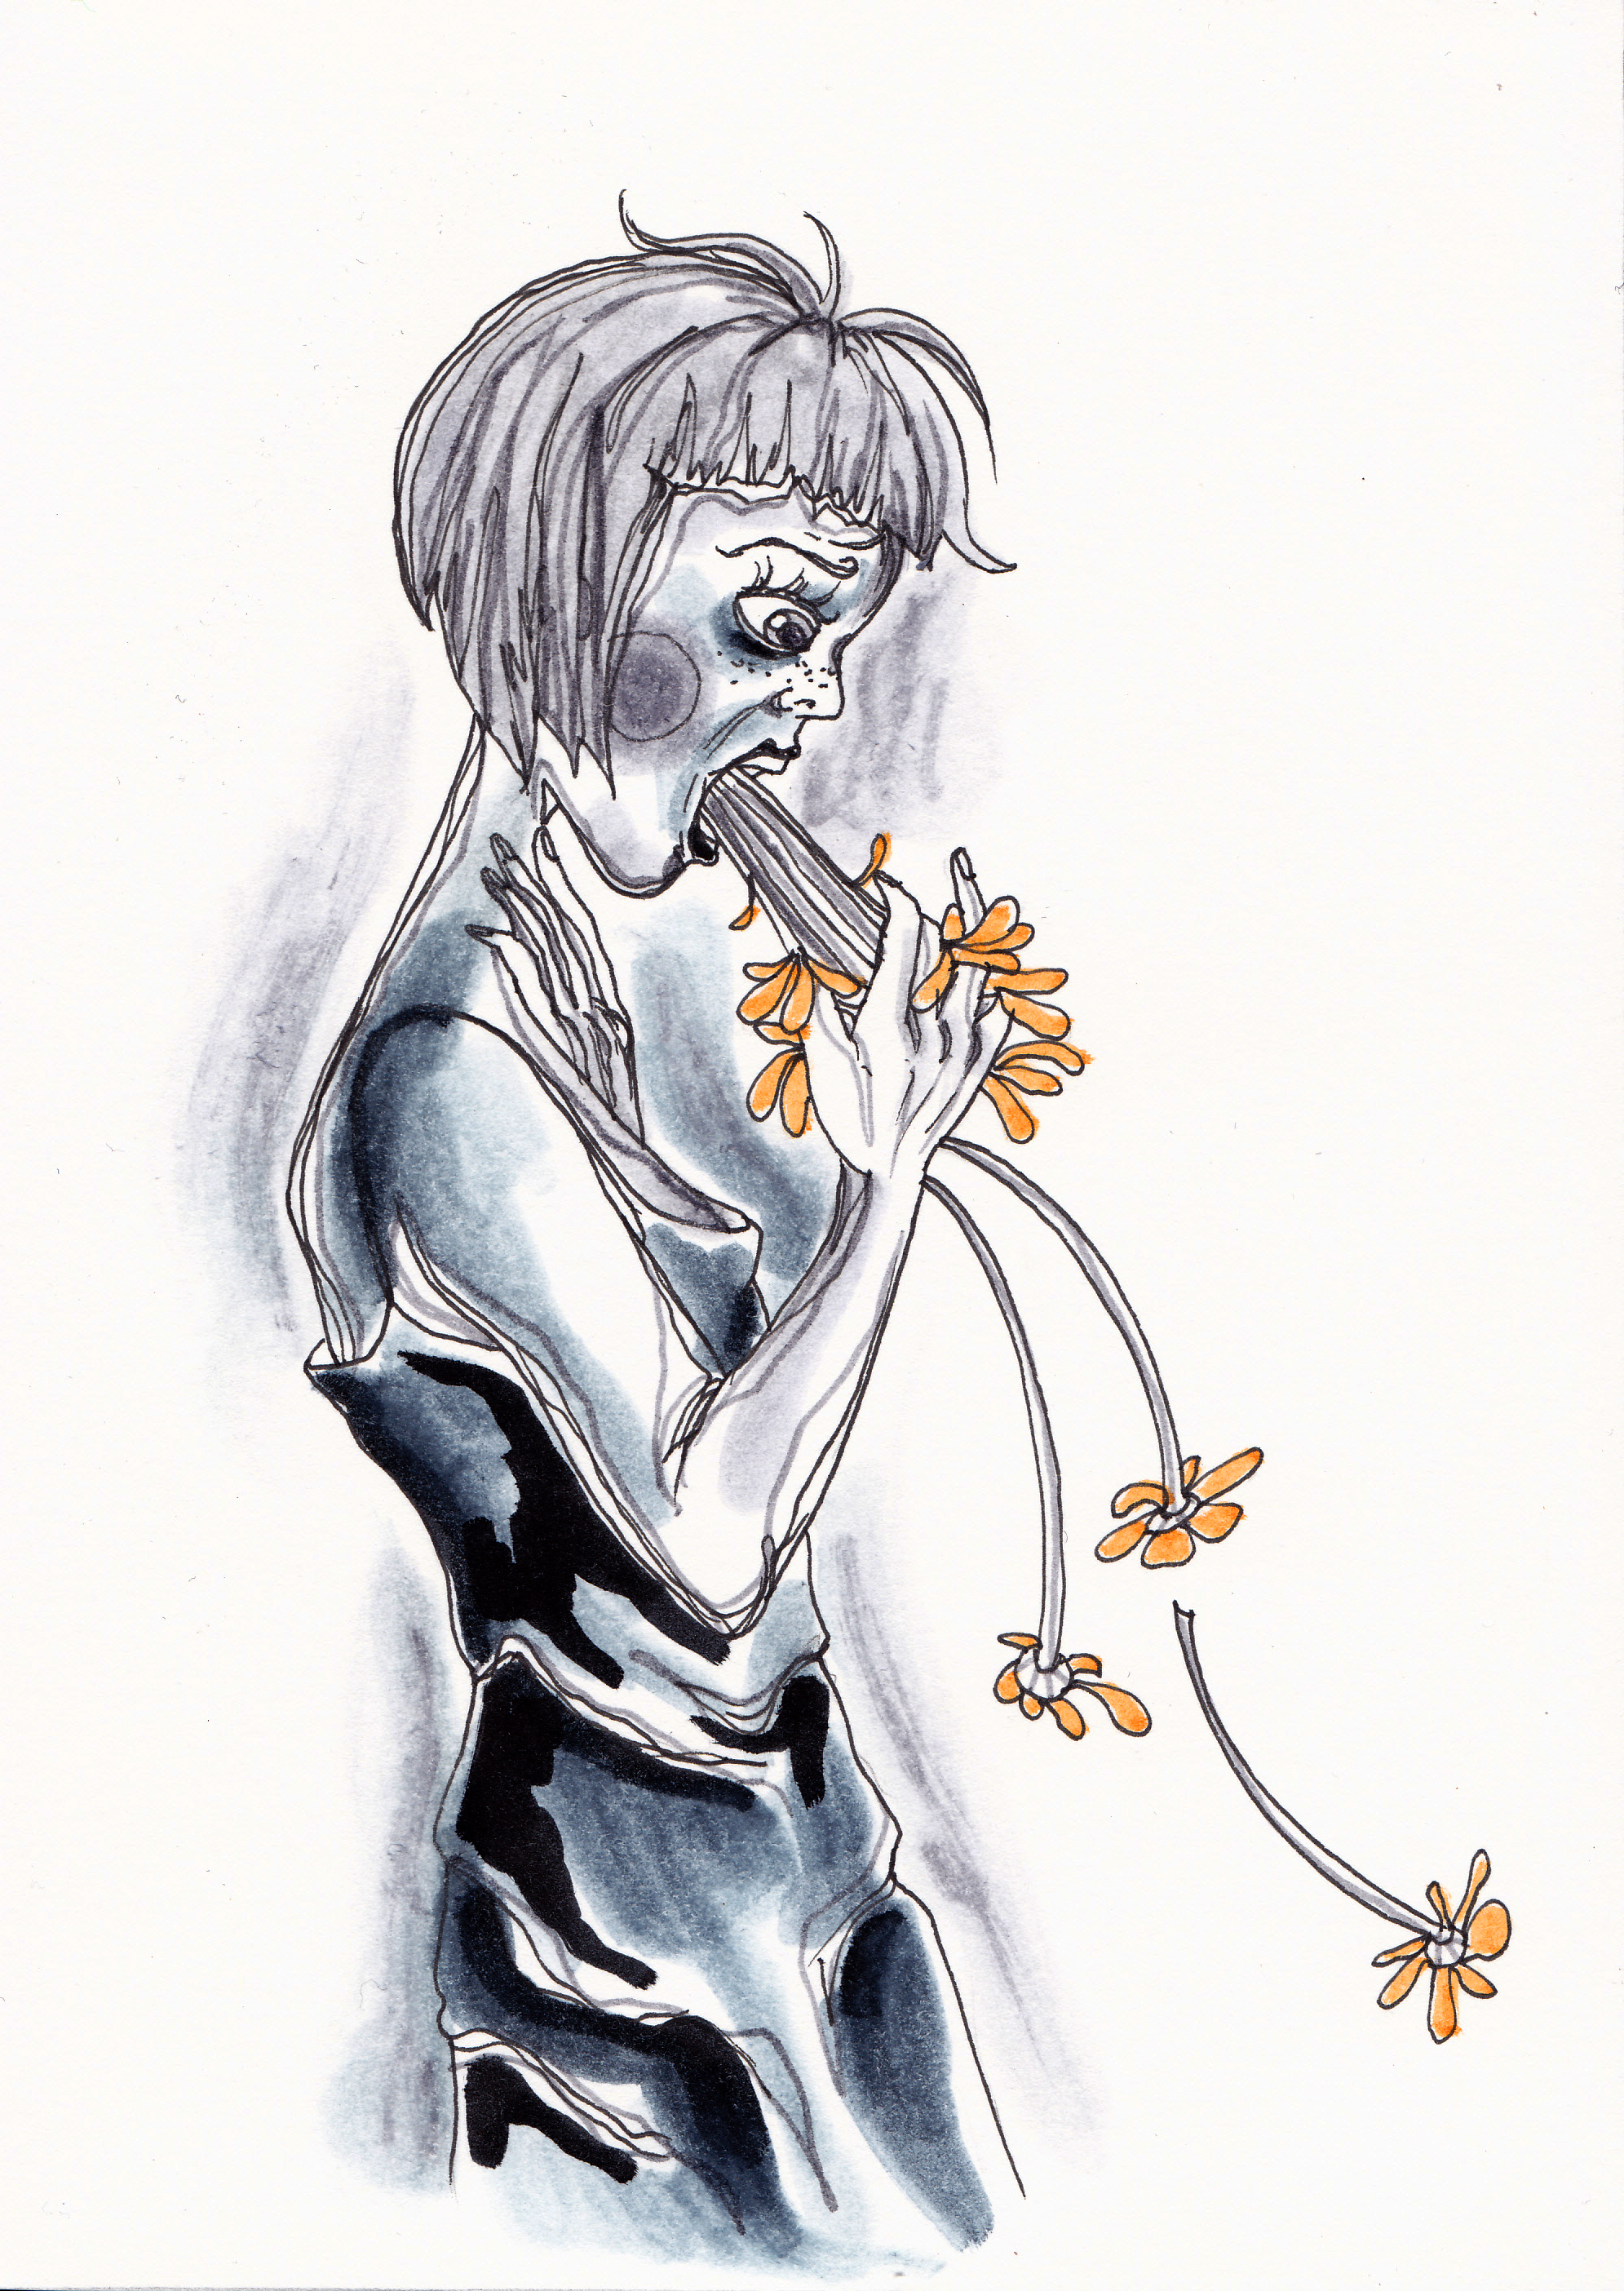


1. Add Text

transformation

Transformation, 18×24 Mixed Media, Do-All of Bay City’s Annual Art Clash Award Winner

Adding pattern based text, small print from books, magazines, or the newspaper, automatically adds not physical but visual texture to a piece. It is a simple, intriguing way to add the appearance of greater detail to your piece, whether it is ripped and layered in the background or cut into shapes to fill in focal objects in the foreground.730a10c1435c579f6052846f164896a9

The meaning of the words don’t have to be important. Or, you can choose theme appropriate text and emphasize certain words to add to your piece’s meaning. This is a popular technique borrowed from art journaling and found text poetry.
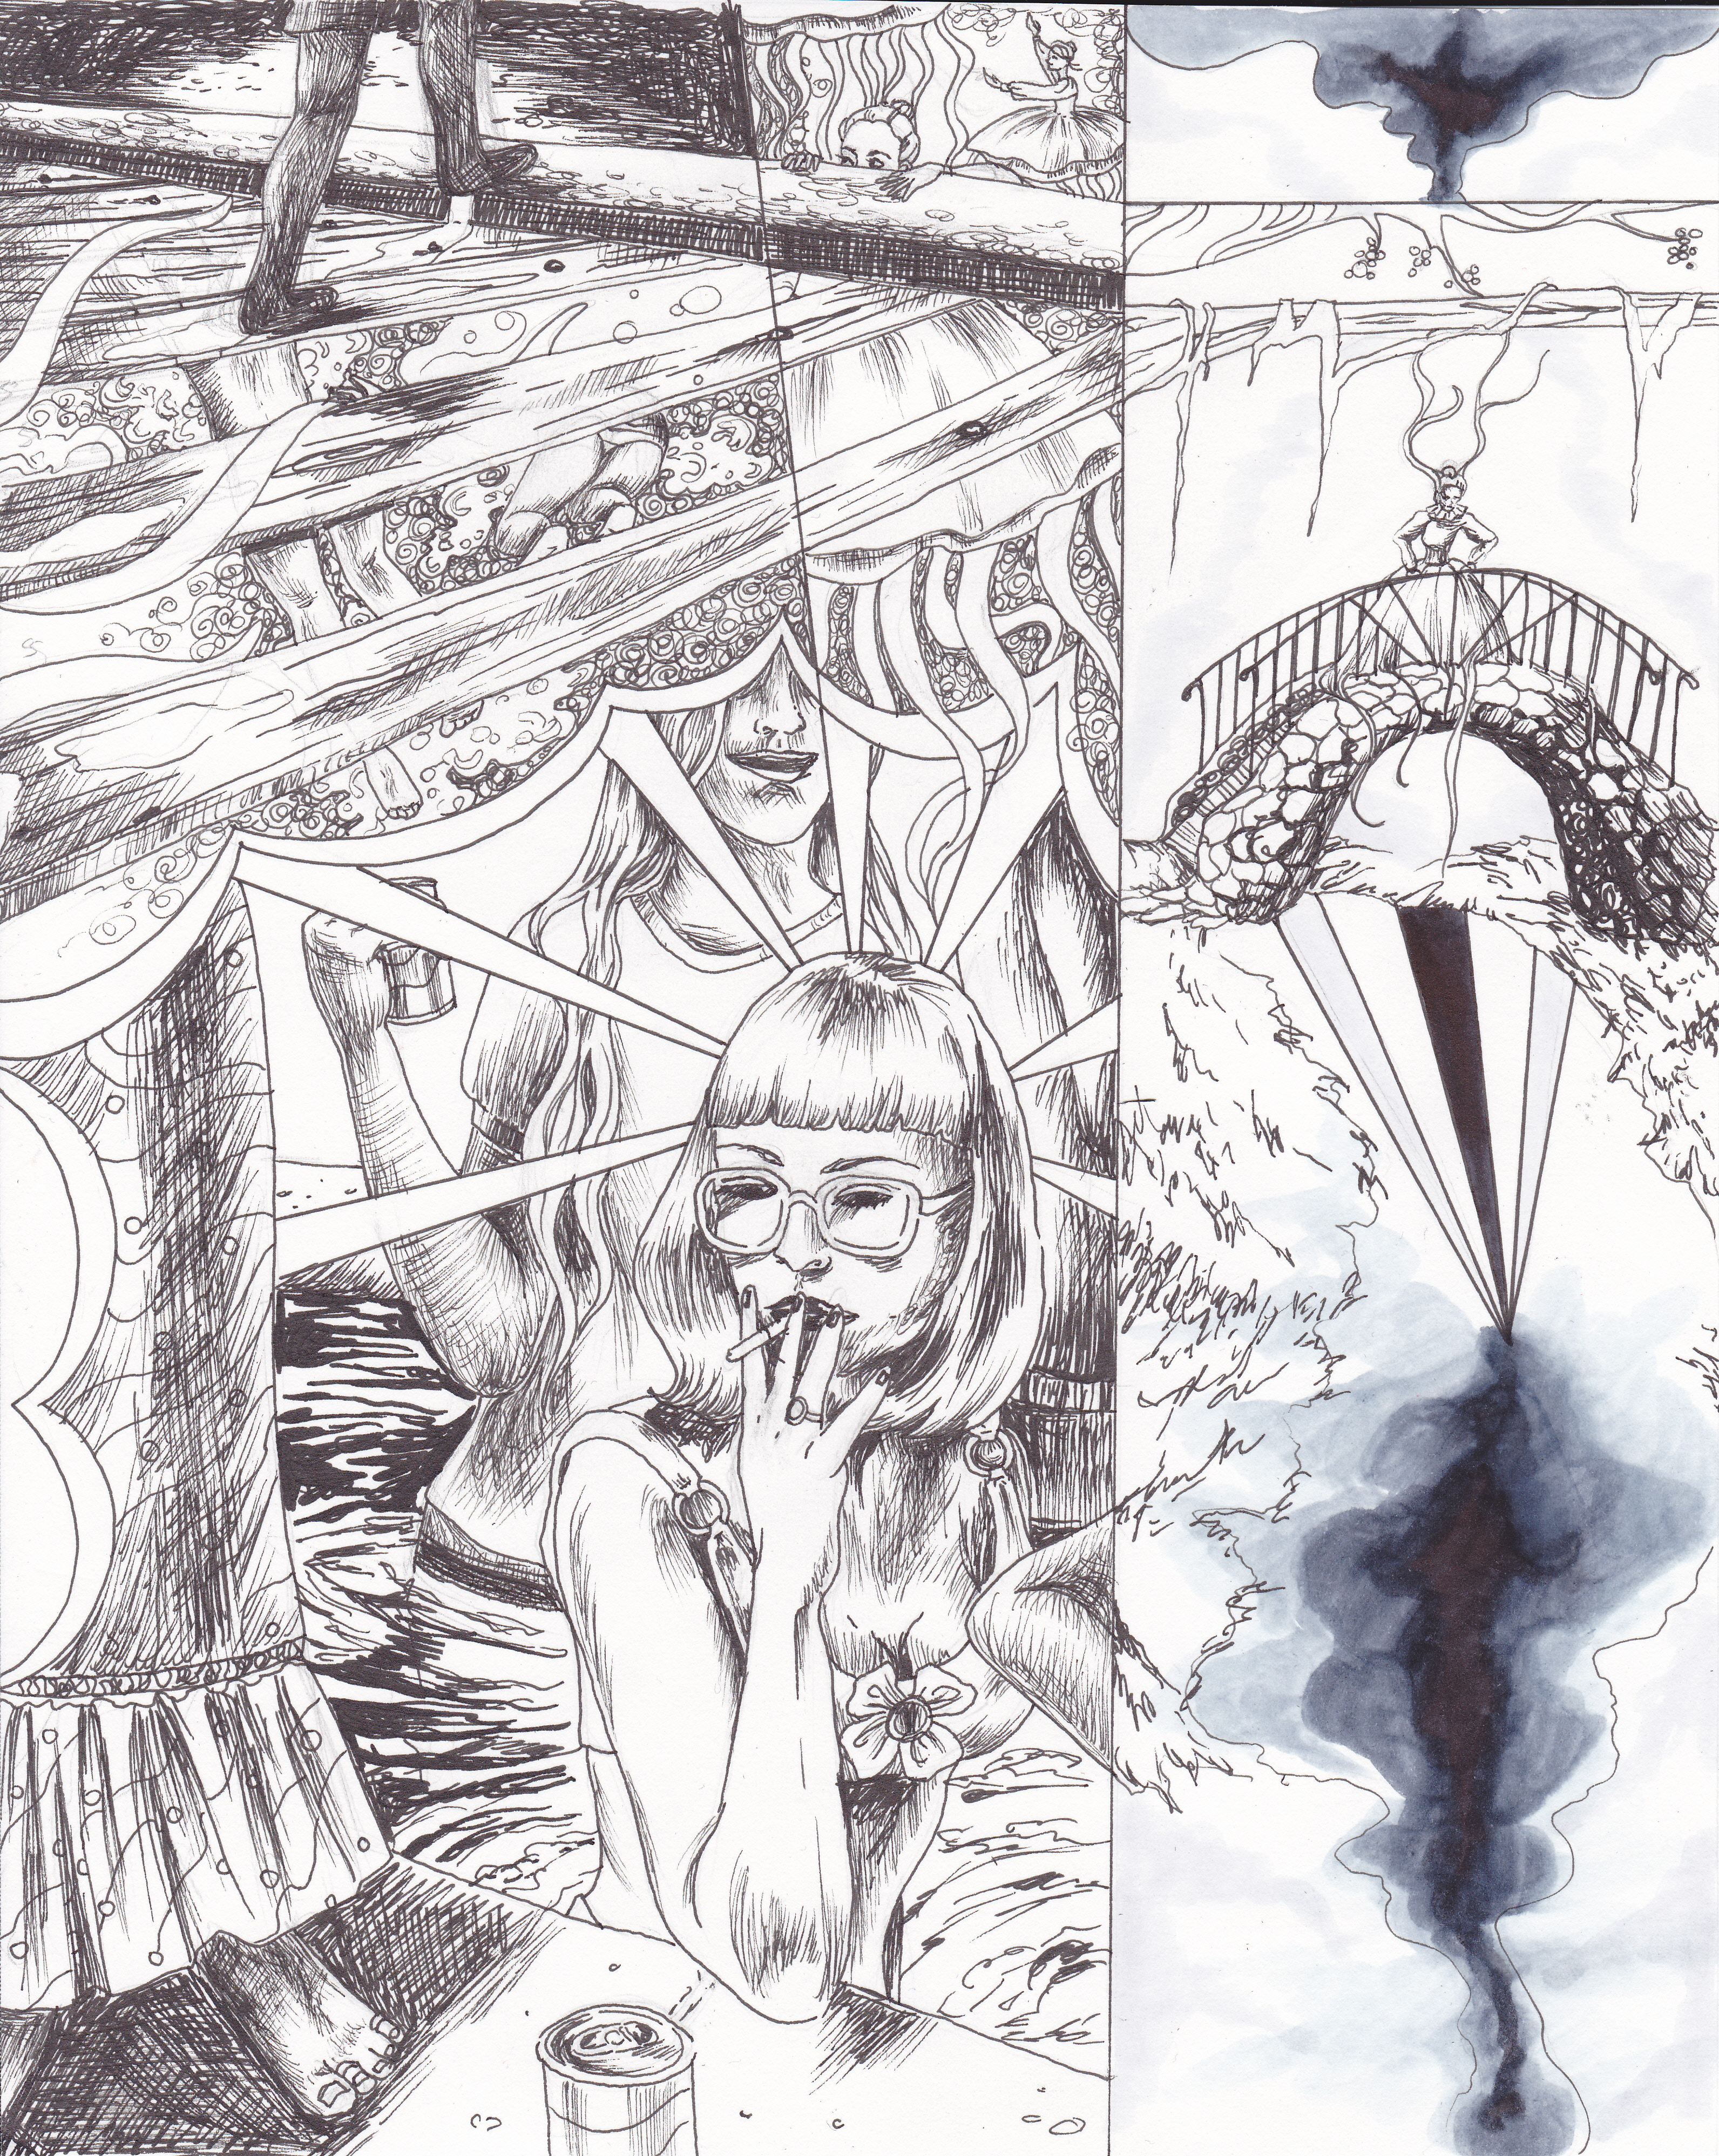
 

2. Include Texture

the dance

The Dance, Awarded Best 2D in Creative 360’s Piece By Piece Exhibition 2015; 18x 24 prismacolor pencil, ink, watercolor, fabric, book pages, embroidery thread

2D doesn’t have to mean completely smooth and flat. Oftentimes painters paint with a palette knife, slathering on thick layers of paint to create an uneven surface that raises and dips to create visual interest. Gesso can also be used to build up an uneven surface on canvas. Another option is applying mixed media elements to paper to create a textured surface. In the piece above, I crumpled white fabric and dipped it in glue, applying it to the surface for the ground. I crinkled and rolled strips of book pages for the raised texture in the tree trunks and branches.

3. Accent With Metallics

the peacock

The Peacock, Awarded Best 2D in The Midland Artists Guild 2015 Juried Exhibition, 11×14 prismacolor pencil

Varying the surface sheen in a piece is a way to once again increase the visual interest, thus drawing viewer’s eyes and keeping their attention. Metallics are definitely something you want to use with restraint, but when not overdone they can really elevate a piece. It is harder to tell in a photo but in the drawing above, I used silver prismacolor for both the sleeves on her dress and the streaks in the pattern on the brim of her hat.

4. Include Pops of Color

hopeful

Hopeful, Award of Merit in The Midland Artists Guild 2015 Juried Exhibition. 11×14 Prismacolor Pencil 

Adding elements of color amongst an image of mostly black and white is a technique inspired by photo-manipulation. Photographers have been tinting black and white photos since long before Photoshop was ever conceived.

902fa847868c397eded214cf4c8fee5f

Our eyes are naturally drawn to contrast, and including a bright color or two within a sea of black and white provides a “surprise” for the viewer.

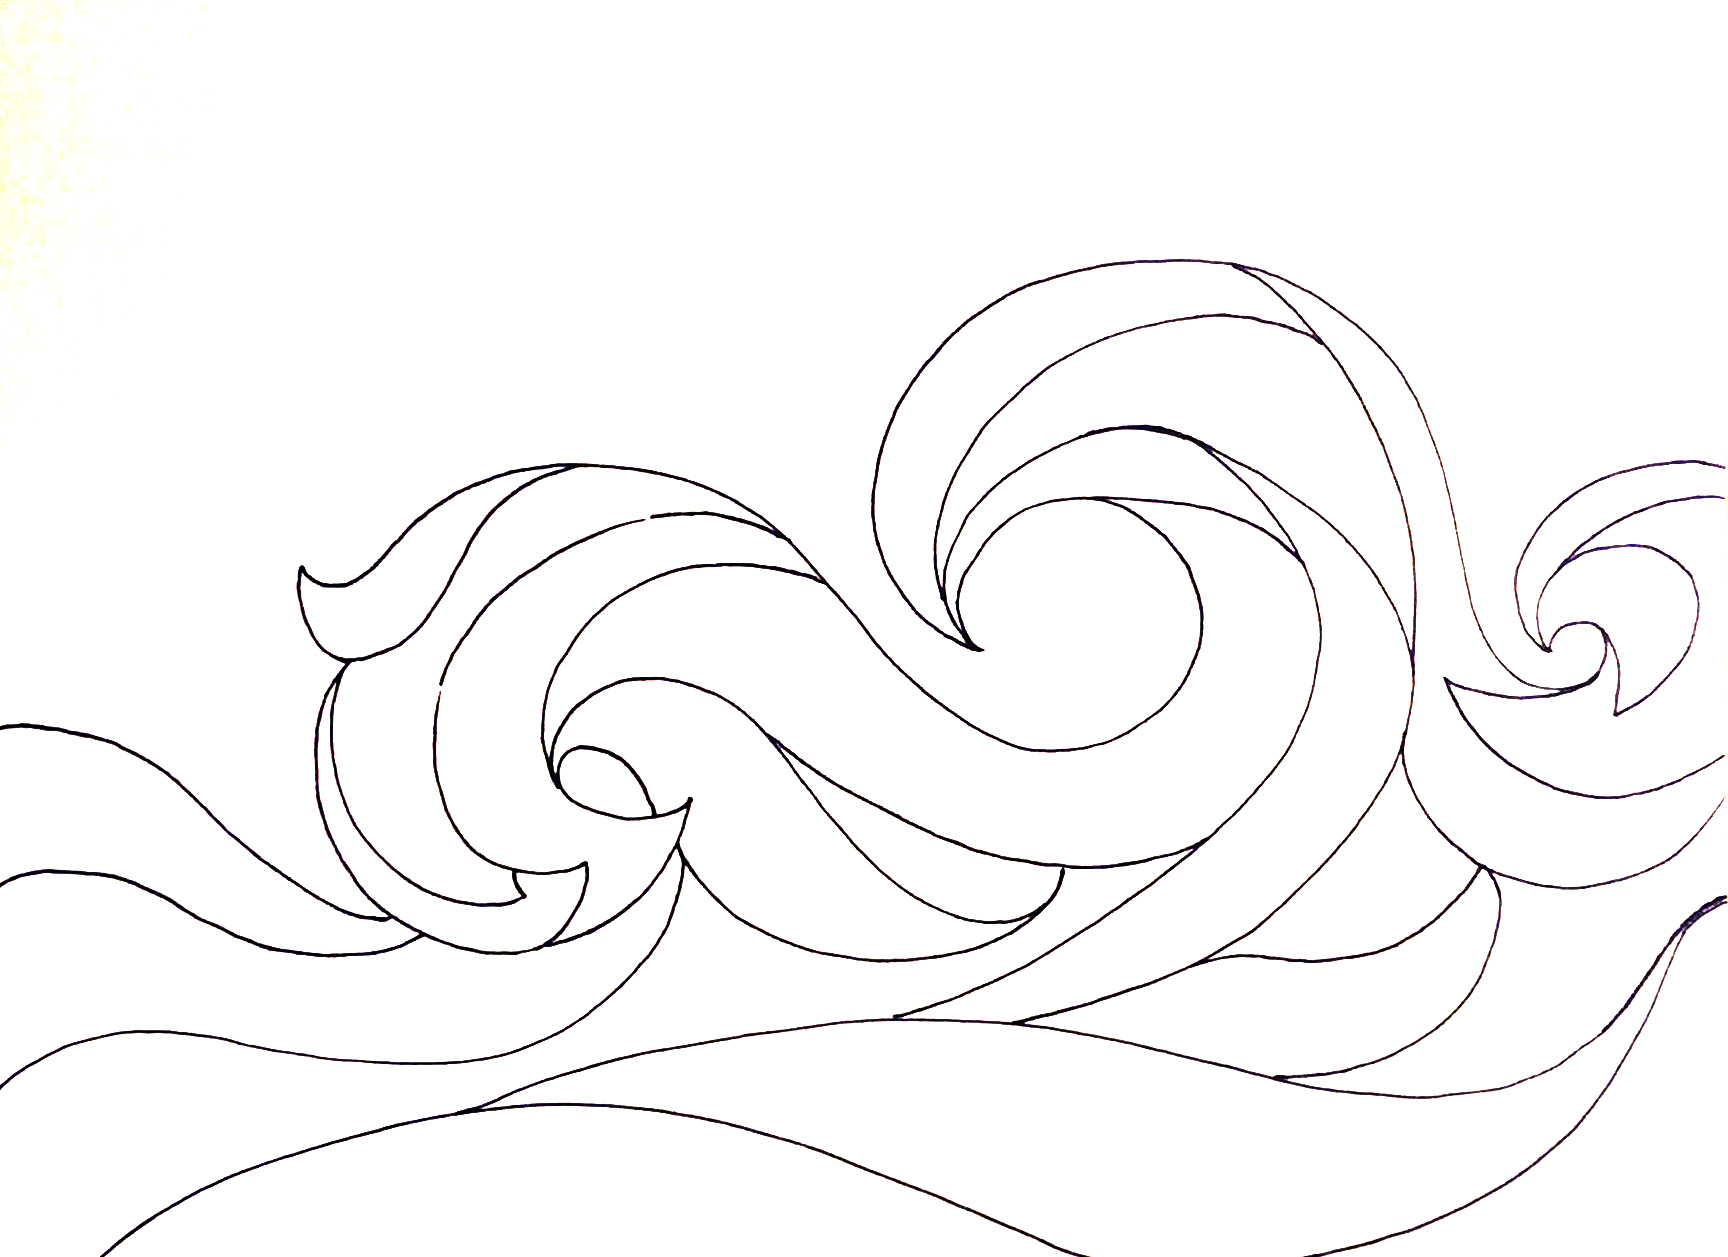
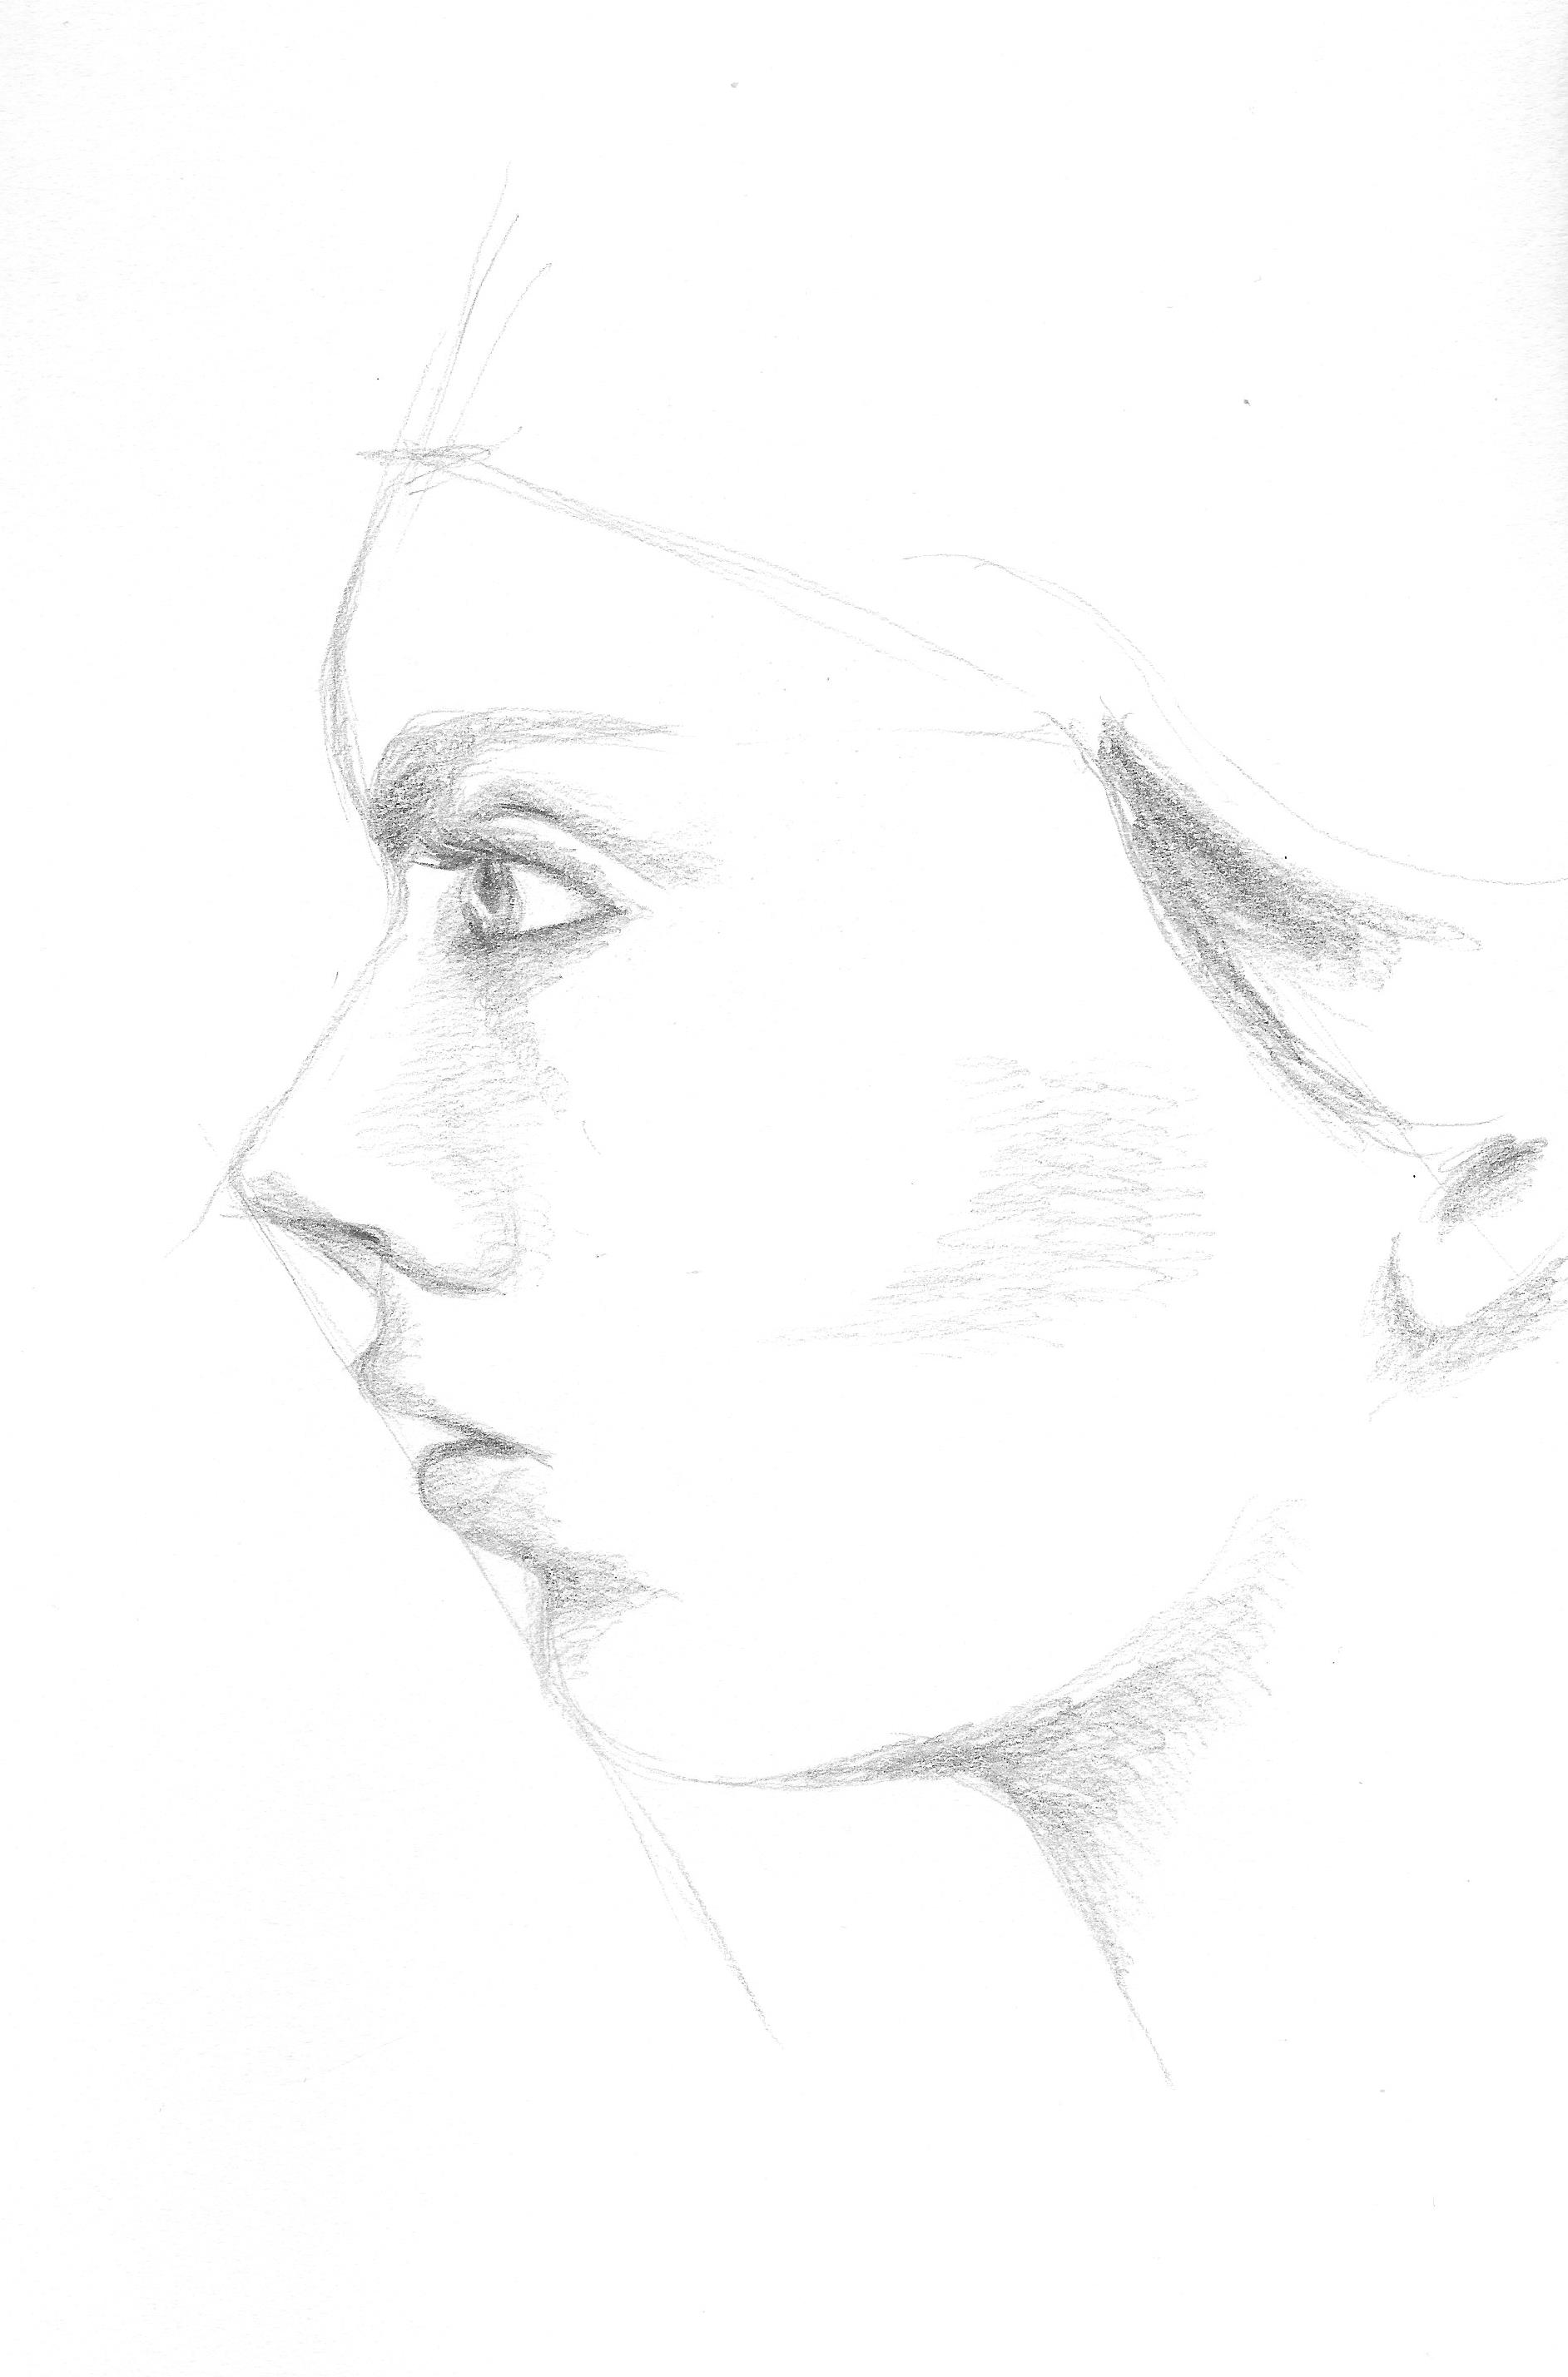
5. Draw Viewers To The Eyes

I may be a bit biased because eyes are my favorite part of the face to draw or paint, but then there is that famous saying, “eyes are the windows to the soul”. There are quite a few articles floating around online about a scientific study that found that staring into someone’s eyes for 10 minutes straight can even cause hallucinations. All this suggests that eyes themselves are something of an intense element. Whether depicting people or animals, using visual elements in your piece that guide the viewer’s eye to meet the eyes of your subject is sure to keep viewers locked on your piece longer, and to create a more dynamic composition.

6. Don’t Ignore The Background.

I used to be guilty of being a huge background-ignorer. Now, you don’t want a fully fleshed out, detailed, photo-realistic background all the time, and in some pieces there is a lot to be said for white space. But, there is a difference between a background looking purposefully understated to emphasize the main focus and a background looking incomplete, like the artist just ran out of ideas and didn’t want to bother. There are two pieces shown above, one from 5 years ago on the left and one from 2 years ago on the right. Notice the difference something as simple as some softly outlined trees makes. The background is still mostly white, but it looks complete.

7. Collaborate With Other Artists

This is a hard one for me, because I honestly hate collaborating. I’m the kid in school who dreaded partner assignments. I always wanted to work on projects alone, even if it meant I had to do triple the work. I have a hard time letting go of control and not getting to make all the creative decisions myself. However, you learn so much from working with other artists, especially if their style is the complete opposite of yours as was the case in the two collaborations above. Do I necessarily like the collaborative pieces above better than the work I traditionally do on my own? To be honest, nope, but that’s not the point. I practiced techniques and styles I never would have attempted otherwise, which has given me ideas in other pieces I’ve done on my own.

8. Carry Around A Sketch Journal

devotional gag reflex

Devotional Gag Reflex, 2011, Ink

Not only is keeping a sketch journal super stress relieving (the above was me relieving some of my fun relational stress by comically depicting how I felt in the moment), but it provides an arsenal of recorded ideas and references to use and combine in future pieces. Life is busy, and I strongly believe we forget most of our best ideas because they happen spontaneously when we are in the middle of doing something, and we think oh I’ll remember it later and of course that never happens. Making yourself carve out a specific time to sit down and sketch may be good practice, but it isn’t when you’ll get your best ideas.

9. Draw From A Collage

collagepen_0001

Oceans Away, 9×12 Ink

One of my assignments in Drawing 101 way back in freshman year of college was to create a collage, and then draw straight from it. This technique is a great way to organize the elements in a piece, and visually construct your conceptual vision. You end up with juxtapositions of disparate elements that you may never have placed together otherwise.

10. Be Purposefully Imperfect

wonderlandlt

Wonderland, 18×24 Mixed Media

This comes back to one of those things I learned through reluctant artist collaboration. I am a clean edged, smooth lines kind of person and I always used to look at smudges and drips as mistakes, not a tool an artist could use on purpose. Now, I am in love with it and every piece I create that includes watercolor has dripping or bleeding somewhere in it. For the longest time throughout art history, the purpose of creating a drawing or painting was to fool the eye into thinking what it was looking at was real, especially before photographs. The informality of declaring to the world, “Look! This is made out of paint, see the brushstrokes, see the dripping?” shakes up a piece, and the viewer’s expectation. In this particular piece above, the surrounding world was supposed to look as it would through the eyes of the subject, a child. The sketchy, imperfect outline of the colorful buildings behind help emphasize that.

Step out of that artistic rut and try something new. Other 2D artists out there, what do you do to add interest to your own work? What draws you to a piece when looking at a 2D work?

Standard
Techniques and Tutorials

Drawing Profiles and Roaring 20s Twisted Damsels

In both portrait drawing and portrait photography, the most dynamic of compositions often involve partial or full profiles, because profiles by nature create more interestingly shaped negative space around a figure. Profiles are also THE most dreaded type of portrait to draw. For years I shunned them after far too many failed attempts, my lovely subjects coming down with the dreaded gorilla-lips curse; that tragic moment when you end up with either too much or not enough space between the nose and chin to squeeze the lips into, and then there is the question of how far should the lips actually stick out anyway? Hence, we end up with the look of a monkey trying to blow a patron a kiss at the zoo… not good. I forced myself to peruse tutorials after finding far too many wonderful 1920s flapper photographs of kickass ladies I wanted to include in my compositions, all taken in profile! Coupling this with my own experimentation, I believe I have come up with some pretty solid methods to make drawing profiles easier. What works for one artist may not necessarily work for another and there are many different approaches, but I hope this gets you started.

*Some of the angled guidelines appear to be a bit different in the photo versus the drawing, but don’t be confused! The images got put into my scanner and they simply weren’t all lined up *perfectly* straight since the paper I used was too big and hung off the edges of the scanner to begin with. So, ignore any of these visual discrepancies as scanner error :)*

*The reason I don’t start with the classic “oval head shape* is because a profile tends to deviate from that roundness eventually anyway, and you will inevitably run out of room in the end and wind up trying to squash the mouth into that restricting beginning oval size and shape. Doing this, you will either not have enough room between the nose and mouth, or have a nonexistent chin. It’s much easier for me to get the features down first, and then use a measuring tool (I always go with the eye) to inform you in how high the forehead should rise, how far back the rest of the skull should extend, etc; everything kept in proportion to everything else.

This is the image we will be working from. You will notice the line running diagonally from nose to chin - this is a lifesaver! On every single face, no matter what the proportions, the end of the nose, lips, and chin will all touch a diagonal line drawn from nose to chin, the exact angle of this line may just vary. This will be a HUGE help to us later.

This is the image we will be working from. You will notice the line running diagonally from nose to chin – this is a lifesaver! On every single face, no matter what the proportions, the end of the nose, lips, and chin will all touch a diagonal line drawn from nose to chin, though the exact angle of this line will vary. This will be a HUGE help to us later.

Have you ever seen artists when drawing a still life or model lifting their pencil up, squinting at it, and then laying it against their paper? They are using their pencil as a guide to gauge the correct angle, and we can do that with a photo reference as well.  Lay your pencil against the angle of the forehead to gauge the angle start, and then move the pencil over to your paper and create that same angle.

Have you ever seen artists when drawing a still life or model lifting their pencil up, squinting at it, and then laying it back down against their paper? They are using their pencil as a guide to gauge the correct angle, and we can do that with a photo reference as well. Lay your pencil against the angle of the forehead, and then move the pencil over to your paper and create that same angle in a light pencil line.

Use the same pencil technique to gauge the under slope of the forehead as well as the angle of the nose. Round out the intersections of these 3 lines. Don't worry about the length of the nose yet, just make the line.

Use the same pencil technique to gauge the under slope of the forehead, as well as the angle of the nose. Round out the intersections of these 3 lines. Don’t worry about the length of the nose yet, just make the line.

Next, outline the eye relative to the size of the slope between the forehead and nose. This is important because the eye will be used as a handy measuring tool in the future. Don't worry about the unique shape of the model's eye right now, just make a rounded off triangle of proportionate size to the bridge of the nose.

Next, outline the eye relative to the size of the slope between the forehead and nose. This is important because the eye will be used as a handy measuring tool in the future. Don’t worry about the unique shape of the model’s eye right now, just make a rounded off triangle of proportionate size to the bridge of the nose.

Now, use the eye height to measure the length the nose should be. How many eye heights fit down the length of the nose? In this case it was 3. Mark off that end point. From that point, draw your diagonal line that will be a guide for the mouth and chin as well, using your pencil to gauge the angle from the photo.

Now, use the eye height to measure the length the nose should be. How many eye heights fit down the length of the nose? In this case it was 3. Mark off that end point. From that point, draw your diagonal line that will be a guide for the mouth and chin as well, using your pencil to gauge the angle from the photo.

There are many different techniques for this step, just check out pinterest. What I've found easiest is concentrating on the shape of the negative space created between the diagonal line and the facial features rather than the facial features themselves.

There are many different techniques for correctly outlining the shape of a portrait’s features in profile, just check out pinterest. What I’ve found easiest is almost ignoring the features and concentrating on the shape of the negative space created between the diagonal line and the facial features rather than the facial features themselves.

Concentrate on the 3 shapes of negative space created, between the nose and top lip, between the top and bottom lip, and between the bottom lip and chin, and draw them in. Definitely use your pencil to gauge the angles. Then, step back and compare what you have to the photo, note if anything doesn't look quite right, and touch up where need be.

Concentrate on the 3 shapes of negative space created, between the nose and top lip, between the top and bottom lip, and between the bottom lip and chin, and draw them in. Definitely use your pencil to gauge the angles. Then, step back and compare what you have to the photo, note if anything doesn’t look quite right, and touch up where need be. Also, use your pencil to gauge the angle of the chin. Draw the line on your paper, and round off where this new line intersects with the already existing diagonal.

Go ahead and add the iris, and the eylid and the arch of the eyebrow. Don't just draw a generic, upside down smile eyelid on top. Pay particular attention to the reference's unique eyelid shape. Also, add some detail to the nose. Note that the nostril ends at about where the lip curves out. Also, gauge the angle with your pencil of the front edge of the eye to the curve of the side of the nose. Draw that angle lightly on your paper. This will indicate where the curve should fall. Once again, don't just draw a parentheses - note the distinct shape of the reference's curve around the nostril - it's a little more straight. As you draw more potraits, you will find that noses (and eyes, and mouths for that matter) are literally like snowflakes - absolutely no two exactly alike.

Go ahead and add the iris, and the eyelid and the arch of the eyebrow. Don’t just draw a generic, upside down smile eyelid on top. Pay particular attention to the reference’s unique eyelid shape. Also, add some detail to the nose. Note that the nostril ends at about where the lip curves out. Also, gauge the angle with your pencil of the front edge of the eye to the curve of the side of the nose. Draw that angle lightly on your paper. This will indicate where the curve should fall. Once again, don’t just draw a parentheses – note the distinct shape of the reference’s curve around the nostril – it’s a little more straight. As you draw more portraits, you will find that noses (and eyes and mouths for that matter) are literally like snowflakes – absolutely no two exactly alike.

Measure how many eye lengths are between the top of the eye and the hairline. Make a mark for the hairline. Use your pencil to gauge the angle between the corner of the eye and where the chin line ends. Make a mark on your paper where the jaw line should end, and curve it up.  Now also know where to properly add the bottom of the ear. It should line up with the angle off the end of the jaw line. The bottom of the ear should always line up with the height of the mouth on a face.

Now measure how many eye lengths are between the top of the eye and the hairline. Make a mark for the hairline. Use your pencil to gauge the angle between the corner of the eye and where the chin line ends. Make a mark on your paper where the jaw line should end, and curve it up. Now you also know where to properly add the bottom of the ear. It should line up with the angle off the end of the jaw line. The bottom of the ear should always fall height wise lined up with the height of the mouth on a face.

Gauge the angle of the hairline with your pencil, and draw that diagonal in where you had your mark at the top of the forehead. Gauge the angle between where the hair drops down and the mouth. Mark that line lightly, and create the second curve for the hair.

Gauge the angle of the hairline with your pencil, and draw that diagonal in where you had your mark at the top of the forehead. Gauge the angle between where the hair drops down and the mouth. Mark that line lightly, and create the second curve for the hair.

Voila! You have a pretty good start to a profile. It still is going to take a TON of practice, but hopefully this advice will make the practice considerably less painful :).

Voila! You have a pretty good start to a profile. It still is going to take a TON of practice, but hopefully this advice will make the practice considerably less painful :).

I took on profiles in this new design for redbubble, the classic flapper with a twist. Check out those eyes! I am having fun designing more bizarre vintage characters, though I'm eventually going to have to go back to my large piece I'm trying to finish. But... not yet ;).

I took on profiles in this new design for redbubble, the classic flapper with a twist. Check out those eyes! I am having fun designing more bizarre vintage characters, though I’m eventually going to have to go back to my large piece I’m trying to finish. But… not yet ;). This snazzy lady’s available on bags, phone cases, even a duvet cover!

Standard