New Work

Surviving Winter In MI, Or Unleashing My Inner Bob Ross

I am like a plant. If I don’t stand in the sun every day I wilt. Unfortunately, I also live in Michigan and I am more wimpy about the cold with each year that passes. Incidentally, I have not been outside as much as I should over the last 2 months. I am always a big fan of if you can’t be outside, bring the outside in so I recently started doing something I never thought I would do after university classes … Painting landscapes!

Though I feel most at peace during a walk in the woods, I always shied away from nature paintings because I tend to lose interest creating something that one could easily just look out their window or at a photo to see. But then I remembered Eyvind Earle, who did the breathtaking background illustrations for Disney’s Sleeping Beauty. He was able to capture a dreamlike quality in his landscapes that still showed us a world that was comforting and familiar, but that we couldn’t quite access in our waking hours.

Growing up in Midland, MI one of our local landmarks is Dow Gardens, a Japanese style garden that celebrates color and geometry. I chose this place as the subject for my first largescale landscape, replacing the blues and greens with purples, yellow ochres, teal, black, and burgundy. I embellished with abstract patterned upholstery fabric for some of the trees, floral cutouts and lily pads for the foreground, and accented some of the rocks and branches with metallic acrylic.

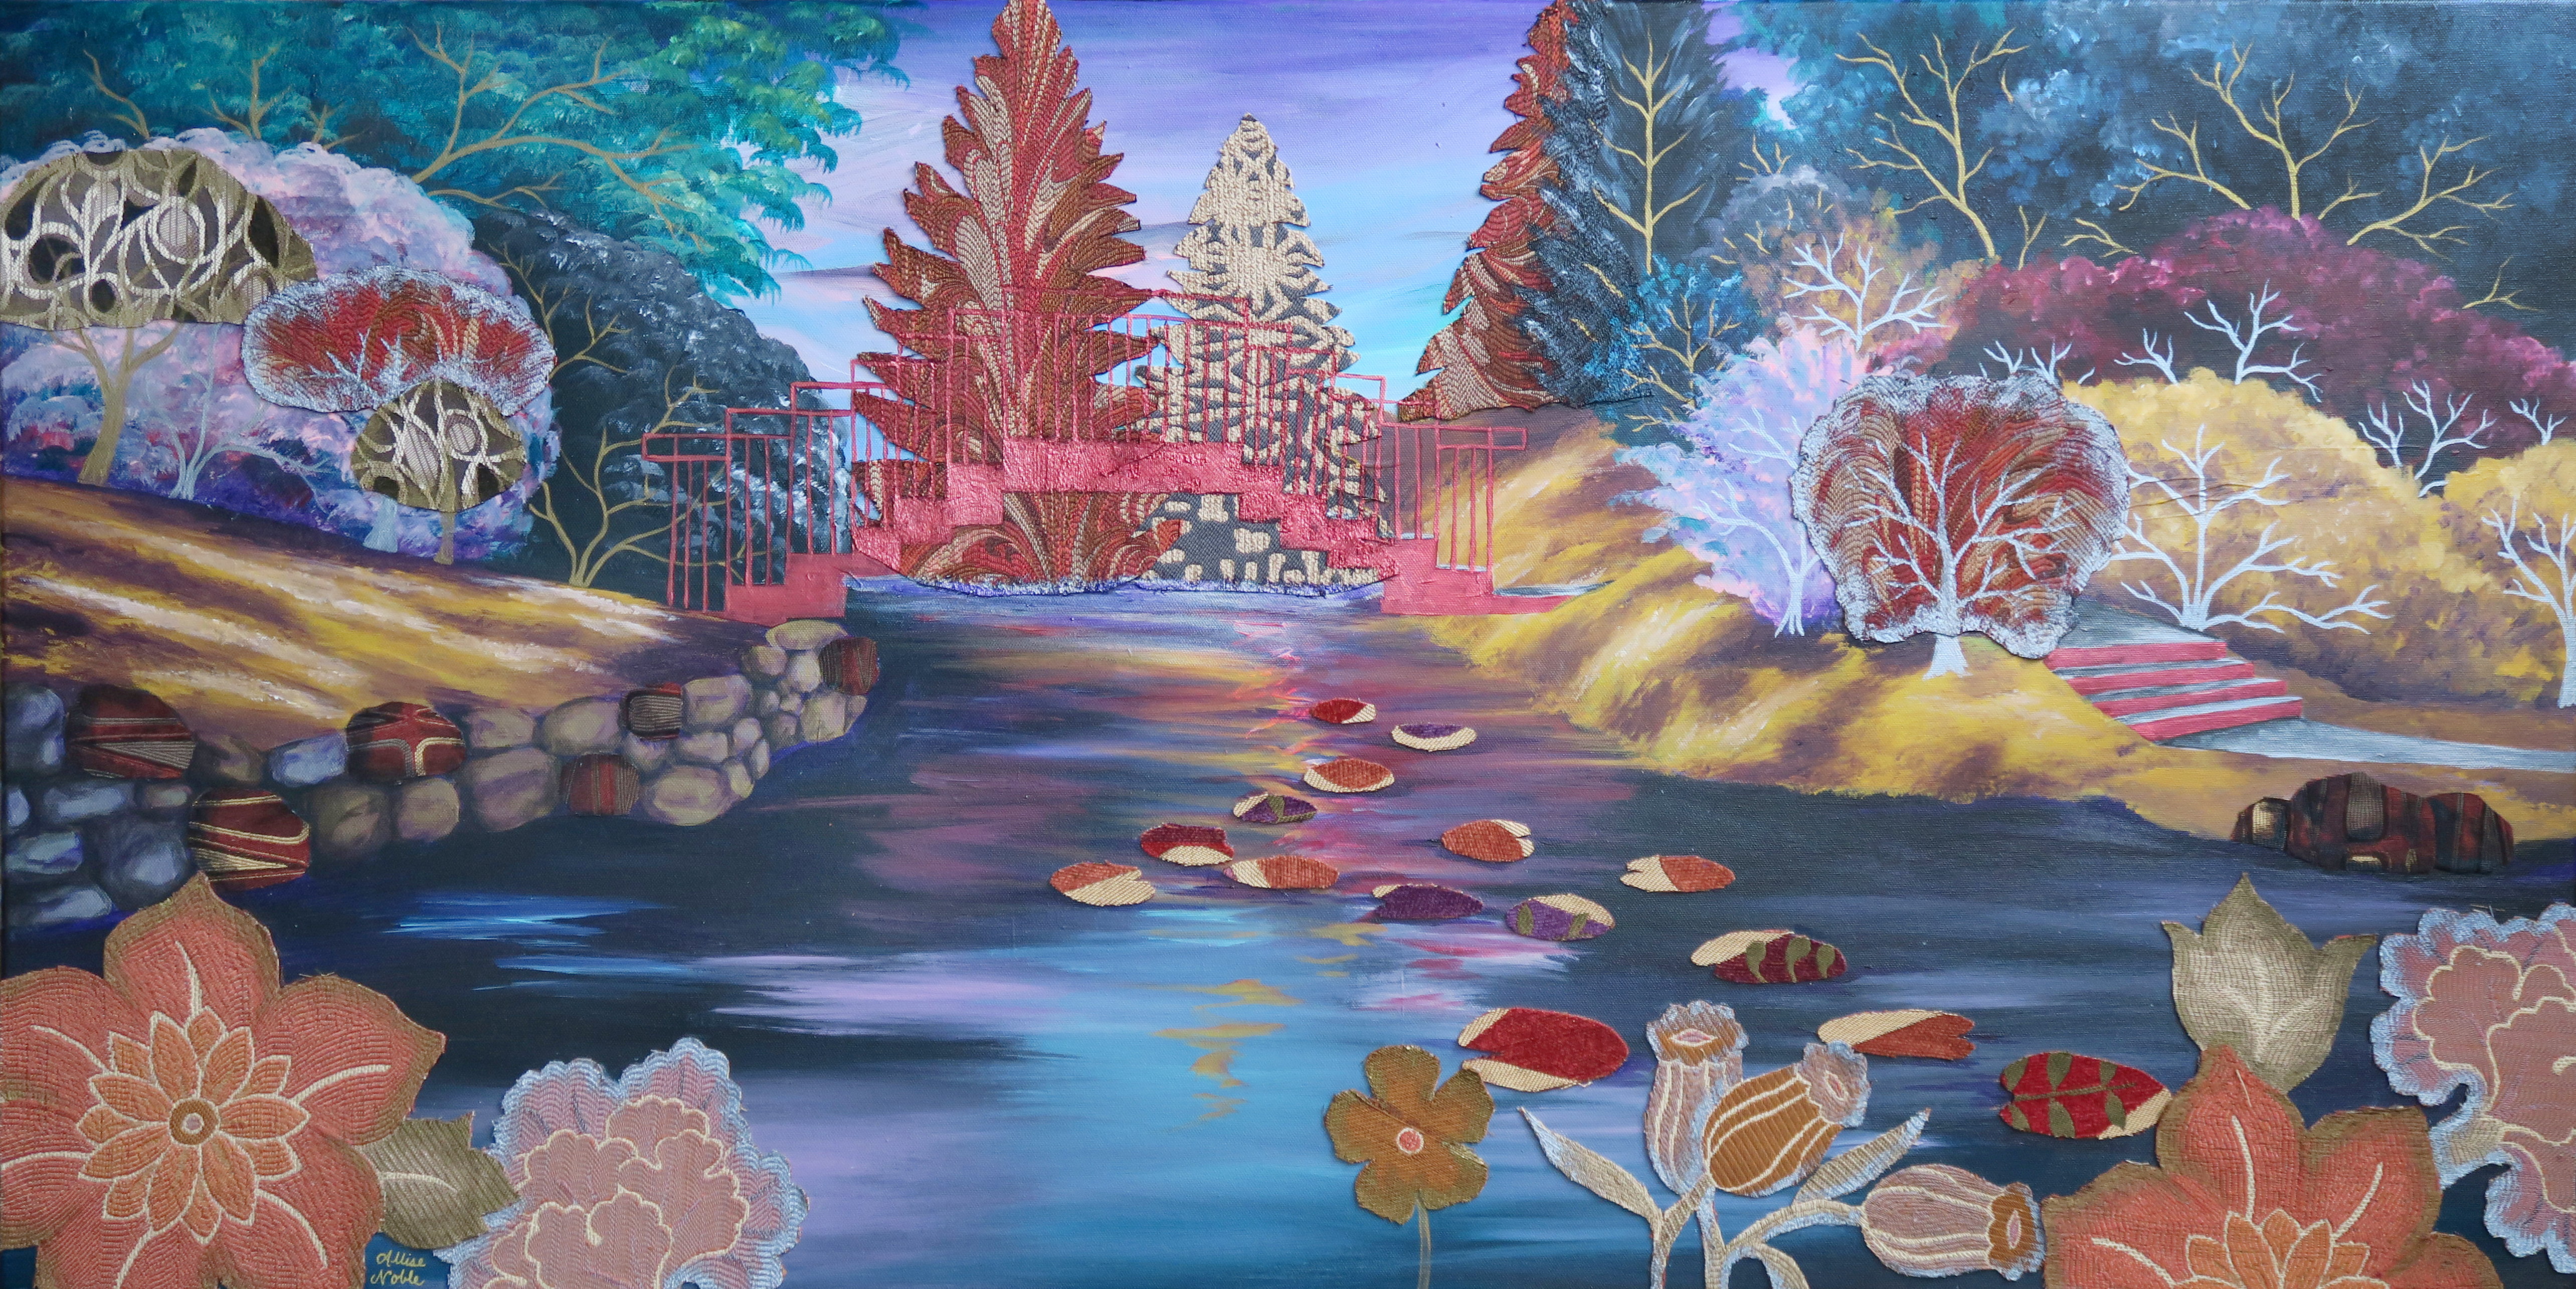
I actually just finished the above piece this past weekend though I started it before my triptych below. Just as I was starting my landscape, I was contacted by King’s Daughters Assisted Living, also in Midland (I live only a city over now but still work in Midland!), to come up with a piece of art for a blank wall they had that would tie together their newly renovated space. I was excited to not only put my painting brain, but my interior design brain as well, to use for this project. The new upholstery and decor was all in blues and greens, but much of the carpet in this mid-century-modern building was a brilliant fire engine red, and that was staying. I immediately thought of the red bridge at Dow Gardens, and suggested this nature scene as a way to tie together the carpet and the new furnishings. Many of the residents at King’s Daughters lived in Midland for decades, and being surrounded by images of familiar places brings joy and comfort, especially for those struggling with memory.

I’m inspired to capture more locations from my own past as I continue to develop my acrylic painting, a relatively new focus for me. Maybe some architecture will be next!

Advertisement
Standard
Project Ideas, Techniques and Tutorials

Charley Harper: Creative Minds Art History Project

I was first drawn to Charley Harper‘s work in the gift shop of a local museum. One of my dad’s main hobbies is birding and wildlife photography, and Harper’s Mid-Century-Modern style illustrations just screamed the perfect birthday gift.

Harper grew up on a farm in the Midwest, and was inspired by the wildlife he experienced around him. He called his style “minimal realism”, taking in the world around him and distilling the imagery he observed down to the most essential details. He said, “When I look at a wildlife or nature subject, I don’t see the feathers in the wings, I just count the wings. I see exciting shapes, color combinations, patterns, textures, fascinating behavior and endless possibilities for making interesting pictures. I regard the picture as an ecosystem in which all the elements are interrelated, interdependent, perfectly balanced, without trimming or unutilized parts; and herein lies the lure of painting; in a world of chaos, the picture is one small rectangle in which the artist can create an ordered universe.”

Inspired by images from Harper’s body of work that capture his signature style, I encouraged my students this week to create their own minimal realist birds. Though Harper’s works were painted, they bare quite the resemblance to modern day digital art and graphic design. Instead of painting, we used a collage format to create our Charley Harper Birds. We used paint chip samples for our vibrantly colored creatures, colored cardstock for the background, and paint markers to add the linework details. From working on repainting the interior and exterior of a house over the last couple years, I had an accumulation of samples but never felt right throwing away even the colors I ended up not using. Upcycling to the rescue! At an arts non-profit, we love free materials ;). We outlined our geometric shapes onto the samples with a pencil, then cut them out and adhered them to a foam core board base (any heavier paper would work as well) with a standard glue stick. I’d suggest laying out the entire design before gluing in case you want to make some changes before the final masterpiece.

I teach adults with varying physical, psychological, and intellectual disabilities but this project is perfect for all ages and abilities. It is all inspired by simple geometric shapes and blocks of color, and can be done as simple or with as much detail as the artist desires. We created our works in an easy-to-frame 5×7″ size.

I hope you are inspired to try this at home (This would also be a fun project for bored kids, hint hint 😉 )! This is a simple, whimsical project that you don’t have to be an “artist” to enjoy. Unwind after work and get crafty with some basic, easy to access materials. As always, if you end up making one of these yourself I’d love to see pictures!

Standard
Techniques and Tutorials

Mid-Century Modern Tea Party – Butterflies

I’m back with another mid-century modern spring illustrations tutorial! Moving on to my next teacup, today I’m doing butterflies. Similar to my last tutorial, you can create any of these designs the same way on paper with any drawing or painting materials you may have on hand. If painting on glass, keep in mind you will need multiple coats if you want solid coverage, but you may also like the transparency – it’s up to you. To keep your designs permanent, they need to be heated in a conventional oven. Put glass pieces in a cold oven, then set to 350 degrees for 30 minutes. Turn off the heat and LEAVE the glass in the oven until completely cooled down.

For this design, you are going to start with 4 teardrop shapes for your butterfly wings. The top 2 should be tilted at a downward diagonal, and the bottom 2 at an upward diagonal. Try to smooth out your paint as flat and even as possible, spreading out any “globs”. I used a flat brush rather than a round, pointed brush to achieve more even coverage. For the flowers, add some upward facing bell or “cup” shapes at different heights. Once the orange dried on my butterfly wings, I chose to streak some yellow over as well with a smaller round brush.

Next, I added some accents over my solid shapes in white. I painted a smaller identical teardrop shape inside each of my wings. I also added an elongated almond shape to the top of each of my bells which will be the opening of each flower.

I also added the leaves by painting green teardrop shapes tilting diagonally upward centered under each of my flower heads. I dipped the opposite end of my paintbrush in paint and stamped dots down the center of each leaf as an added decoration.

The last addition after the leaves was a small orange diamond in between the bottom butterfly wings. This will start the body. The rest of the body will be added with line work.

Next, I added one more set of teardrop shapes inside the white on the wings in yellow. I also used a fine detail brush to add yellow stripes across the small diamond shape in between my wings.

Last is the line work that brings everything together and makes it pop. For this part, you can either use a black paint marker or a small detail brush with a pointed tip. Outline Your outer bell shape, white flower opening, and leaves.  Add a line connecting the flower head to the leaves. To finish the flower, I then used the tip of my brush and a light touch, hardly pressing on the surface, to add 4 streaks radiating up from the base of the flower head. I also added 5-6 short lines inside each flower opening, and then used the opposite end of my brush to stamp tiny dots on the end of each of these lines on the inside of the flower.  For the butterfly, I outlined each teardrop shape that make up the wings, as well as the small diamond shape.

The last detail was adding a line down the center of the wings, with two curved antennae branching off at the top. 

It’s amazing what you can do with simple shapes! I will be doing 4 designs in all with different flowers and insects, check back for more! The final set will be available for sale in Express Yourself Artshop’s Virtual Gallery, an ongoing fundraiser for the arts and wellness program I direct.

Standard
Techniques and Tutorials

Mid-Century Modern Tea Party – Ladybug

The Mid-Century modern design style has been having a moment for awhile now, and while I’m not usually one to latch onto trends I have always liked the geometric, retro aesthetic of this period.

Illustrations from this period are colorful and based on combinations of simple shapes and lines, which make them accessible to even those who don’t consider themselves “artists”. In this series, I am going to show you how to create some cute mid-century modern inspired bugs and flowers in honor of Spring. I will be painting on glassware (I’ve been dying to do something with these clear tea mugs!), but you can create any of these designs the same way on paper with any drawing or painting materials you may have on hand.

Start with a red vertical oval for your ladybug, and scatter some different large polka dots around it for our flower heads. Paint goes onto glass differently than on paper because it can’t absorb into the surface, so you will need to let your shapes dry and add another coat or two for solid coverage. Try to smooth out your paint as flat and even as possible, spreading out any “globs”.

Once we have our red oval, we are done with our ladybug for awhile. Focusing on the flowers, I added two sets of concentric circles to the bottom of my large dots in different colors, letting the paint dry in between each addition.

After that, it’s time for the leaves! Our leaves will just be simple teardrop shapes, placed next to each other at an angle centered underneath our flower heads. Once the green was dry, I added some white dots down the center of my leaves for some extra decoration. You can add a dotted pattern by dipping the end of your paint brush in paint, and touching it to your glass (or paper) using the paint brush end like a stamp.

Last is the line work that brings everything together and makes it pop. For this part, you can either use a black paint marker or a small detail brush with a pointed tip. Outline all of the shapes that make up your flower in black. I added a teardrop shape to the very center of my flower, but you can also just outline the concentric circles and leave the center alone. I added a line connecting the head to the leaves to finish our flowers. For the ladybug, I put a line down the center of my oval and outlined around the entire shape. I then added a half circle in black sticking up from the top, with two short lines for antennae. I used the end of my paintbrush to add a dot to the end of each antennae. If you have some larger paintbrushes, you can also use the end to stamp the larger dots on the ladybug’s body. Otherwise, just use a round brush with a pointed tip to outline a circle shape in the size you want and then fill it in.

Voila! See, that wasn’t so hard :). You can make some beautiful Spring designs to cover anything your heart desires once you learn the basics of how to build forms with simple shapes. I will be doing 4 designs in all with different flowers and insects, check back for more!


Standard